
任务
In order to complete this exercise, you need to:
- Find an interface application that makes use of the libexif library
- Create a seed corpus of exif samples
- Compile libexif and the chosen application to be fuzzed using afl-clang-lto
- Fuzz libexif until you have a few unique crashes
- Triage the crashes to find a PoC for each vulnerability
- Fix the issues
准备libexif使用的接口程序
要测试的libexif的版本为0.6.14,链接为https://github.com/libexif/libexif/releases/tag/libexif-0_6_14-release
libexif项目中描述了使用libexif作为库的几个前端项目
FRONTENDS
Here are a few frontends to libexif:
- exif: A small command-line utility to show EXIF information in JPEG
files (https://github.com/libexif/exif).- gexif: A GTK+ frontend for editing EXIF data
(https://github.com/libexif/gexif).- gphoto2: A command-line frontend to libgphoto2, a library to access a
wide range of digital cameras (http://www.gphoto.org).- gtkam: A GTK+ frontend to libgphoto2 (http://www.gphoto.org).
- thirdeye: Digital photos organizer and driver for eComStation
(http://ecomstation.ru/thirdeye).- digikam: digital photo management application for KDE
(https://www.digikam.org/)If you would like to migrate your program to use libexif or add EXIF support
to it, don’t hesitate to contact the authors.
选择exif来进行测试,exif是照片中的一些附加信息,包括拍摄参数,图像参数等信息,还可以自定义消息
看了课后解析,这个地方exif的版本要选择对应libexif的版本才没有问题,exif 0.6.15下载地址:https://sourceforge.net/projects/libexif/files/exif/0.6.15/exif-0.6.15.tar.gz/download

构建libexif:
autoreconf -i |
构建exif:
autoreconf -i |
其中PKG_CONFIG_PATH用于指定pkg-config查找库文件的路径,多个路径之间可以用冒号进行分隔。
样本
下载示例图像:wget https://github.com/ianare/exif-samples/archive/refs/heads/master.zip
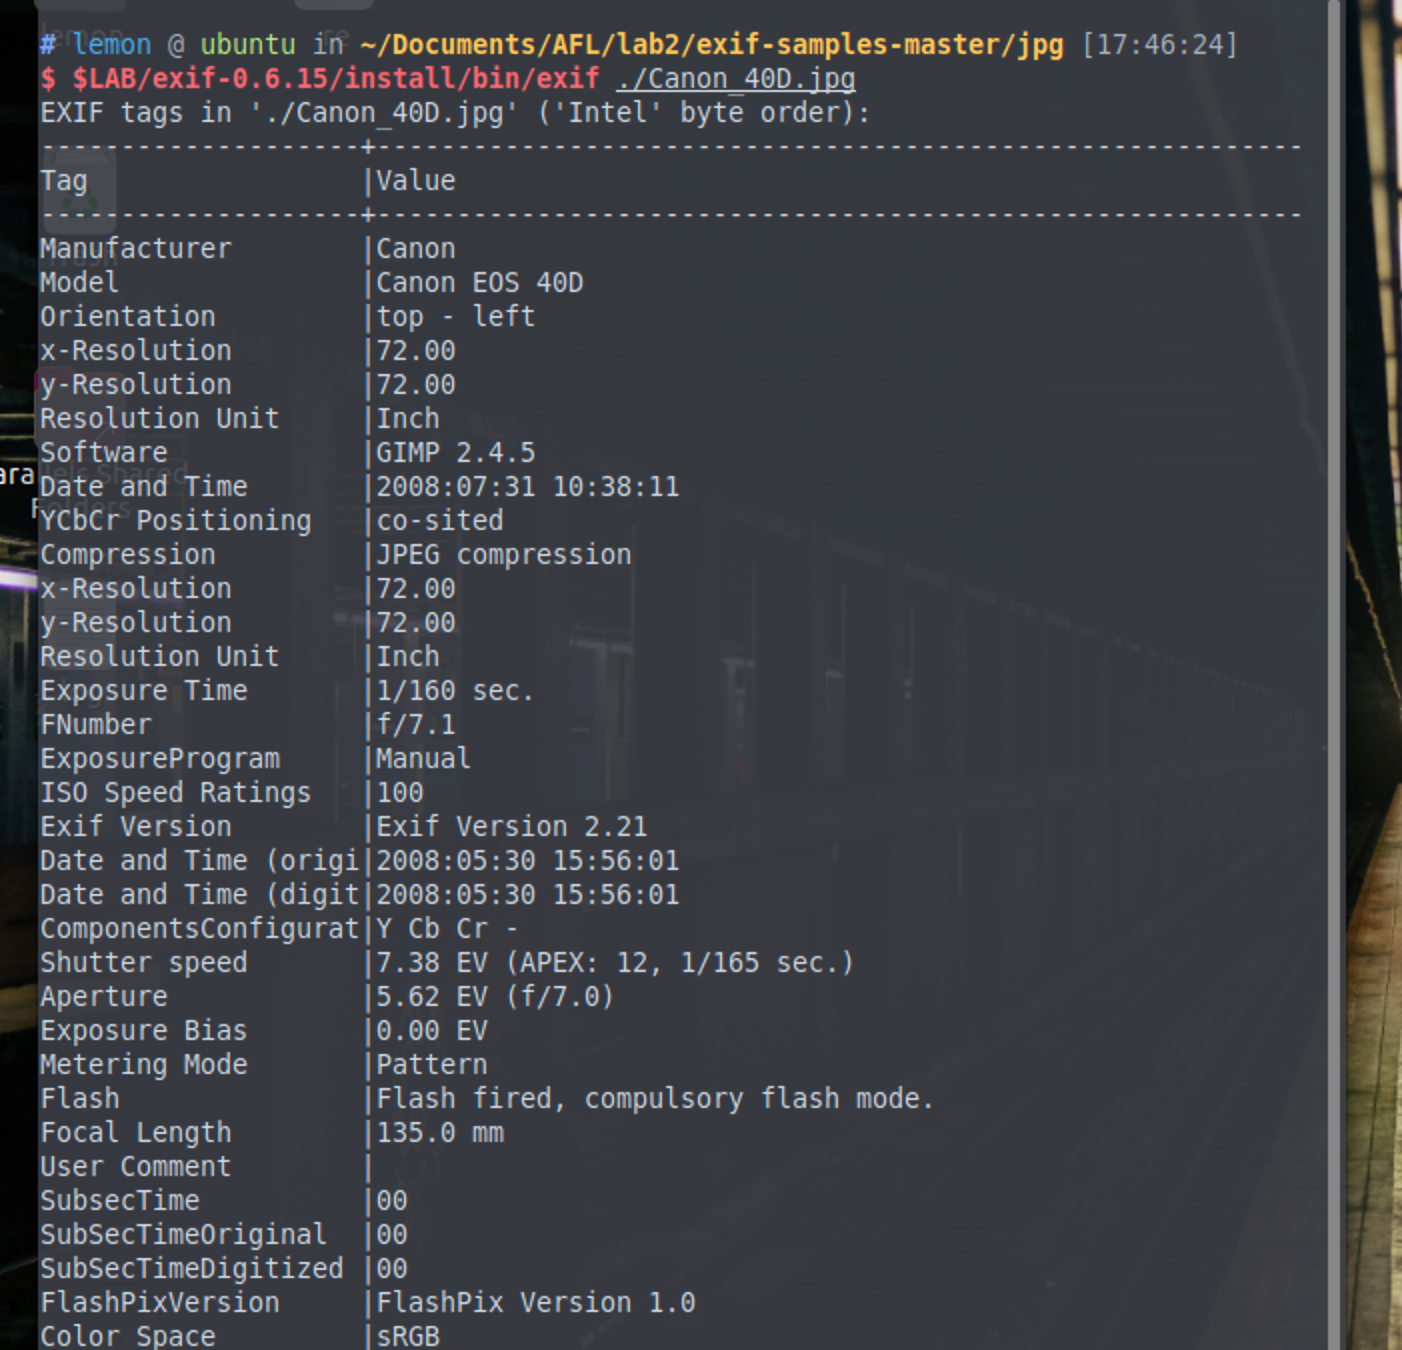
用之前构建的exif查看示例中的样本图像的exif数据:
使用afl-clang-lto编译程序
使用afl-clang-lto编译libexif
rm -r install/ |
使用afl-clang-lto编译exif
rm -r install/ |
实验中还告诉了我们选择编译包装器的技巧:
+————————————————+
| clang/clang++ 11+ is available | —> use LTO mode (afl-clang-lto/afl-clang-lto++)
+————————————————+ see instrumentation/README.lto.md
|
| if not, or if the target fails with LTO afl-clang-lto/++
|
v
+————————————————-+
| clang/clang++ 6.0+ is available | —> use LLVM mode (afl-clang-fast/afl-clang-fast++)
+————————————————-+ see instrumentation/README.llvm.md
|
| if not, or if the target fails with LLVM afl-clang-fast/++
|
v
+————————————————+
| gcc 5+ is available | -> use GCC_PLUGIN mode (afl-gcc-fast/afl-g++-fast)
+————————————————+ see instrumentation/README.gcc_plugin.md and
instrumentation/README.instrument_list.md
|
| if not, or if you do not have a gcc with plugin support
|
v
use GCC mode (afl-gcc/afl-g++) (or afl-clang/afl-clang++ for clang)
开始fuzz
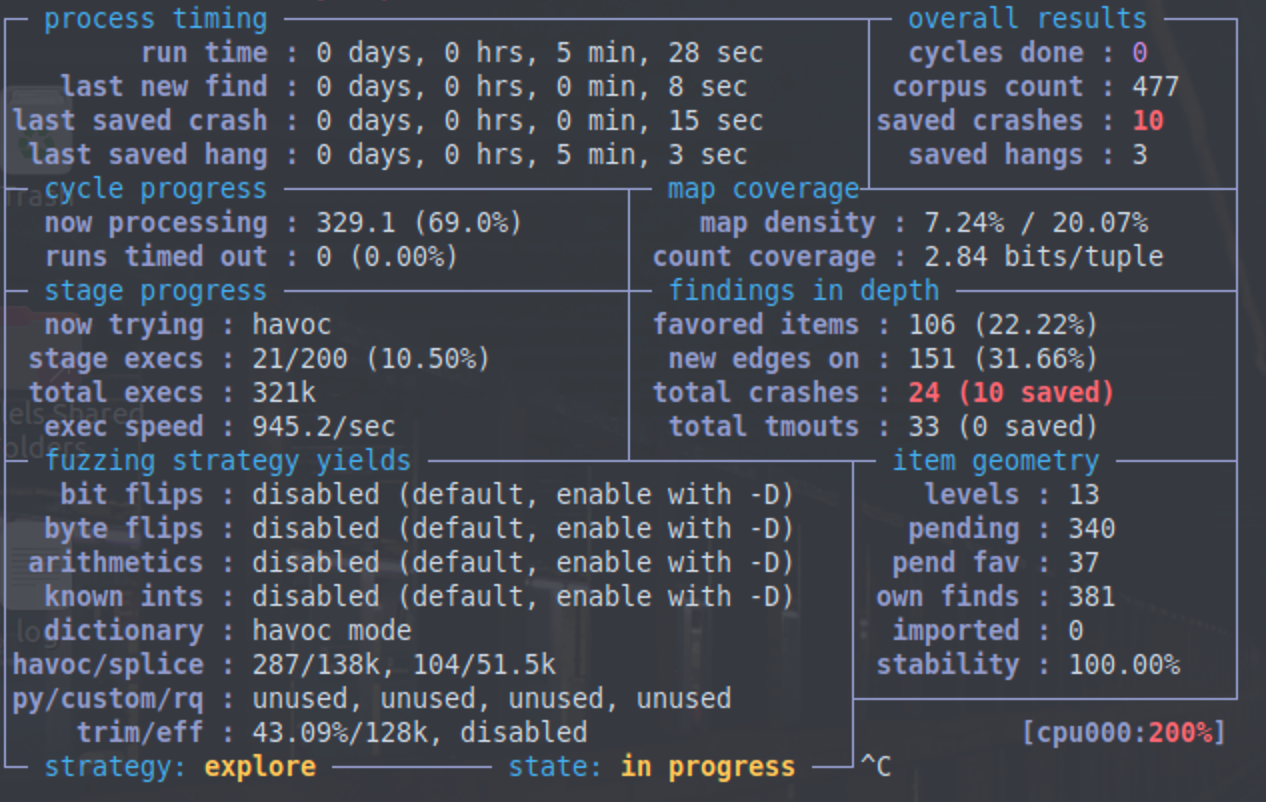
使用afl进行fuzz:
afl-fuzz -i ../exif-samples-master/jpg -o ../fuzz-out/ -s 123 -- ./install/bin/exif @@ |
验证crash
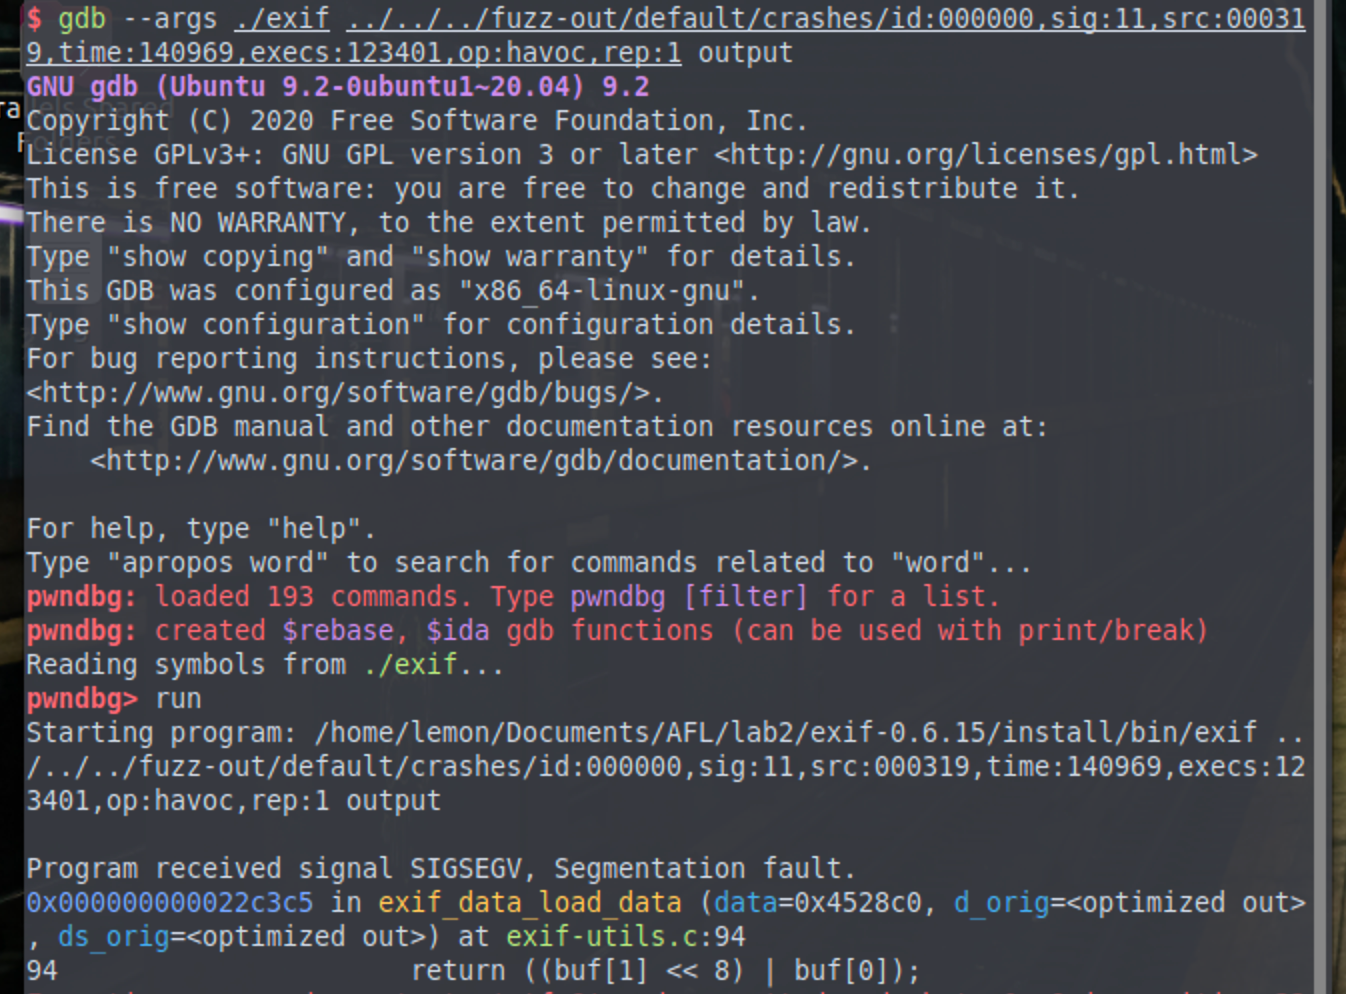
使用gdb进行验证
gdb --args ./exif ../../../fuzz-out/default/crashes/id:000000,sig:11,src:000319,time:140969,execs:123401,op:havoc,rep:1 output |
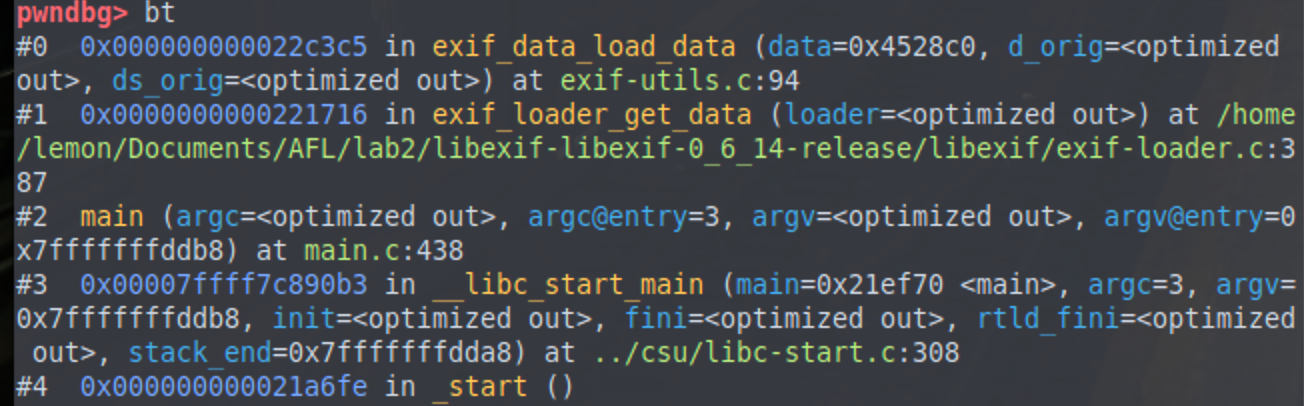
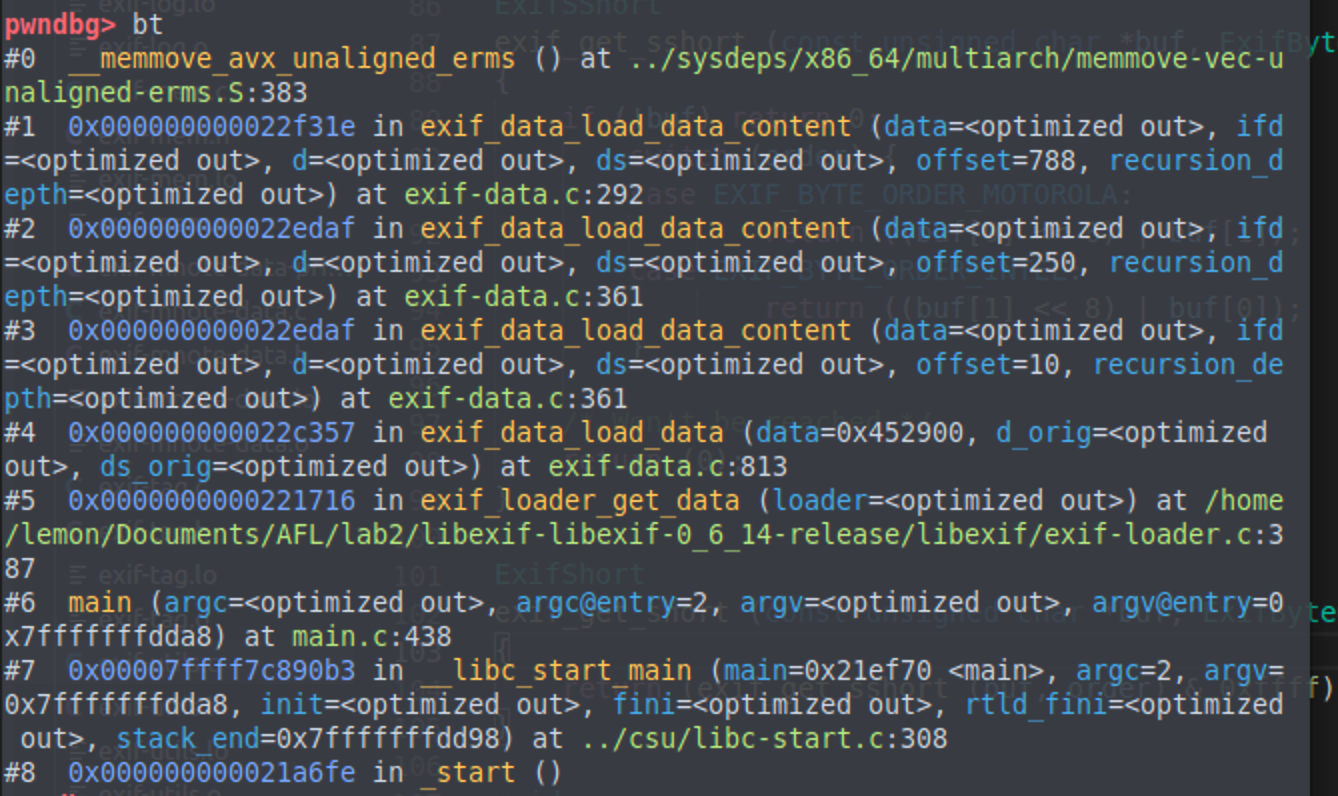
调用栈回溯情况:
另外一种crash:
总结思考
通过实验2,继续加深了使用AFL对程序进行fuzz的基本流程,并且学会了编译包装器的选择,下一步要加深对漏洞的理解与分析。